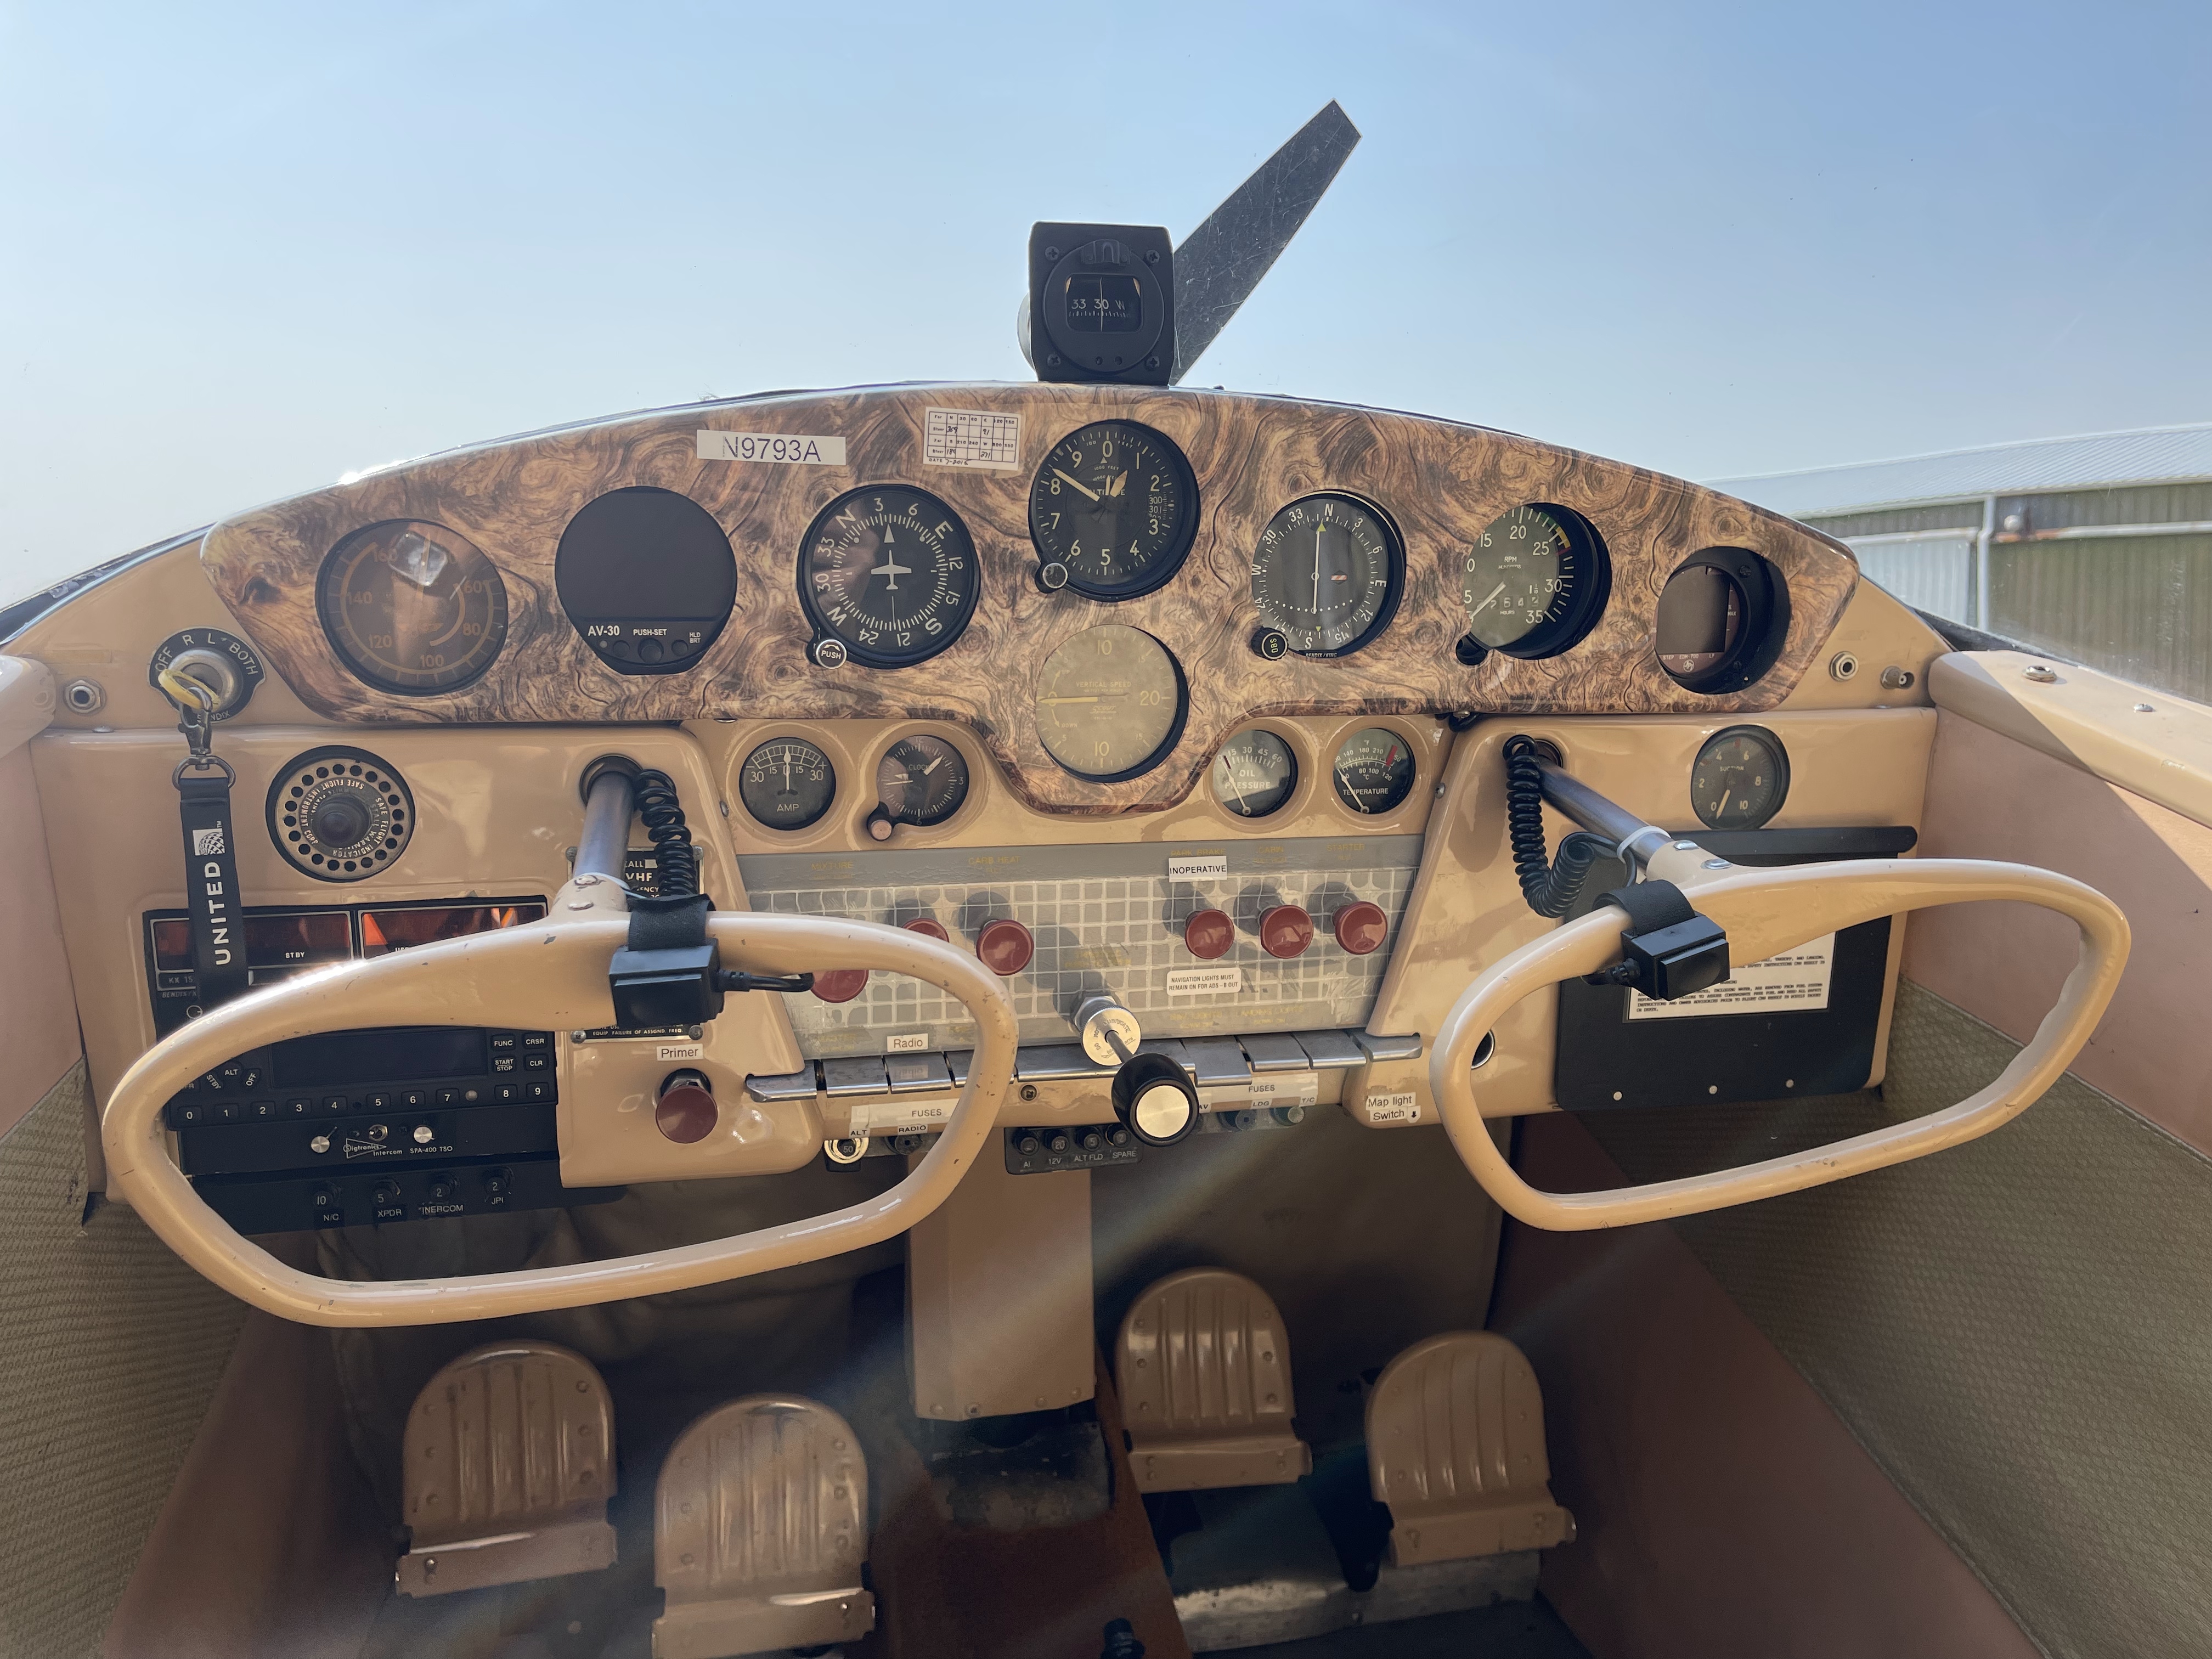
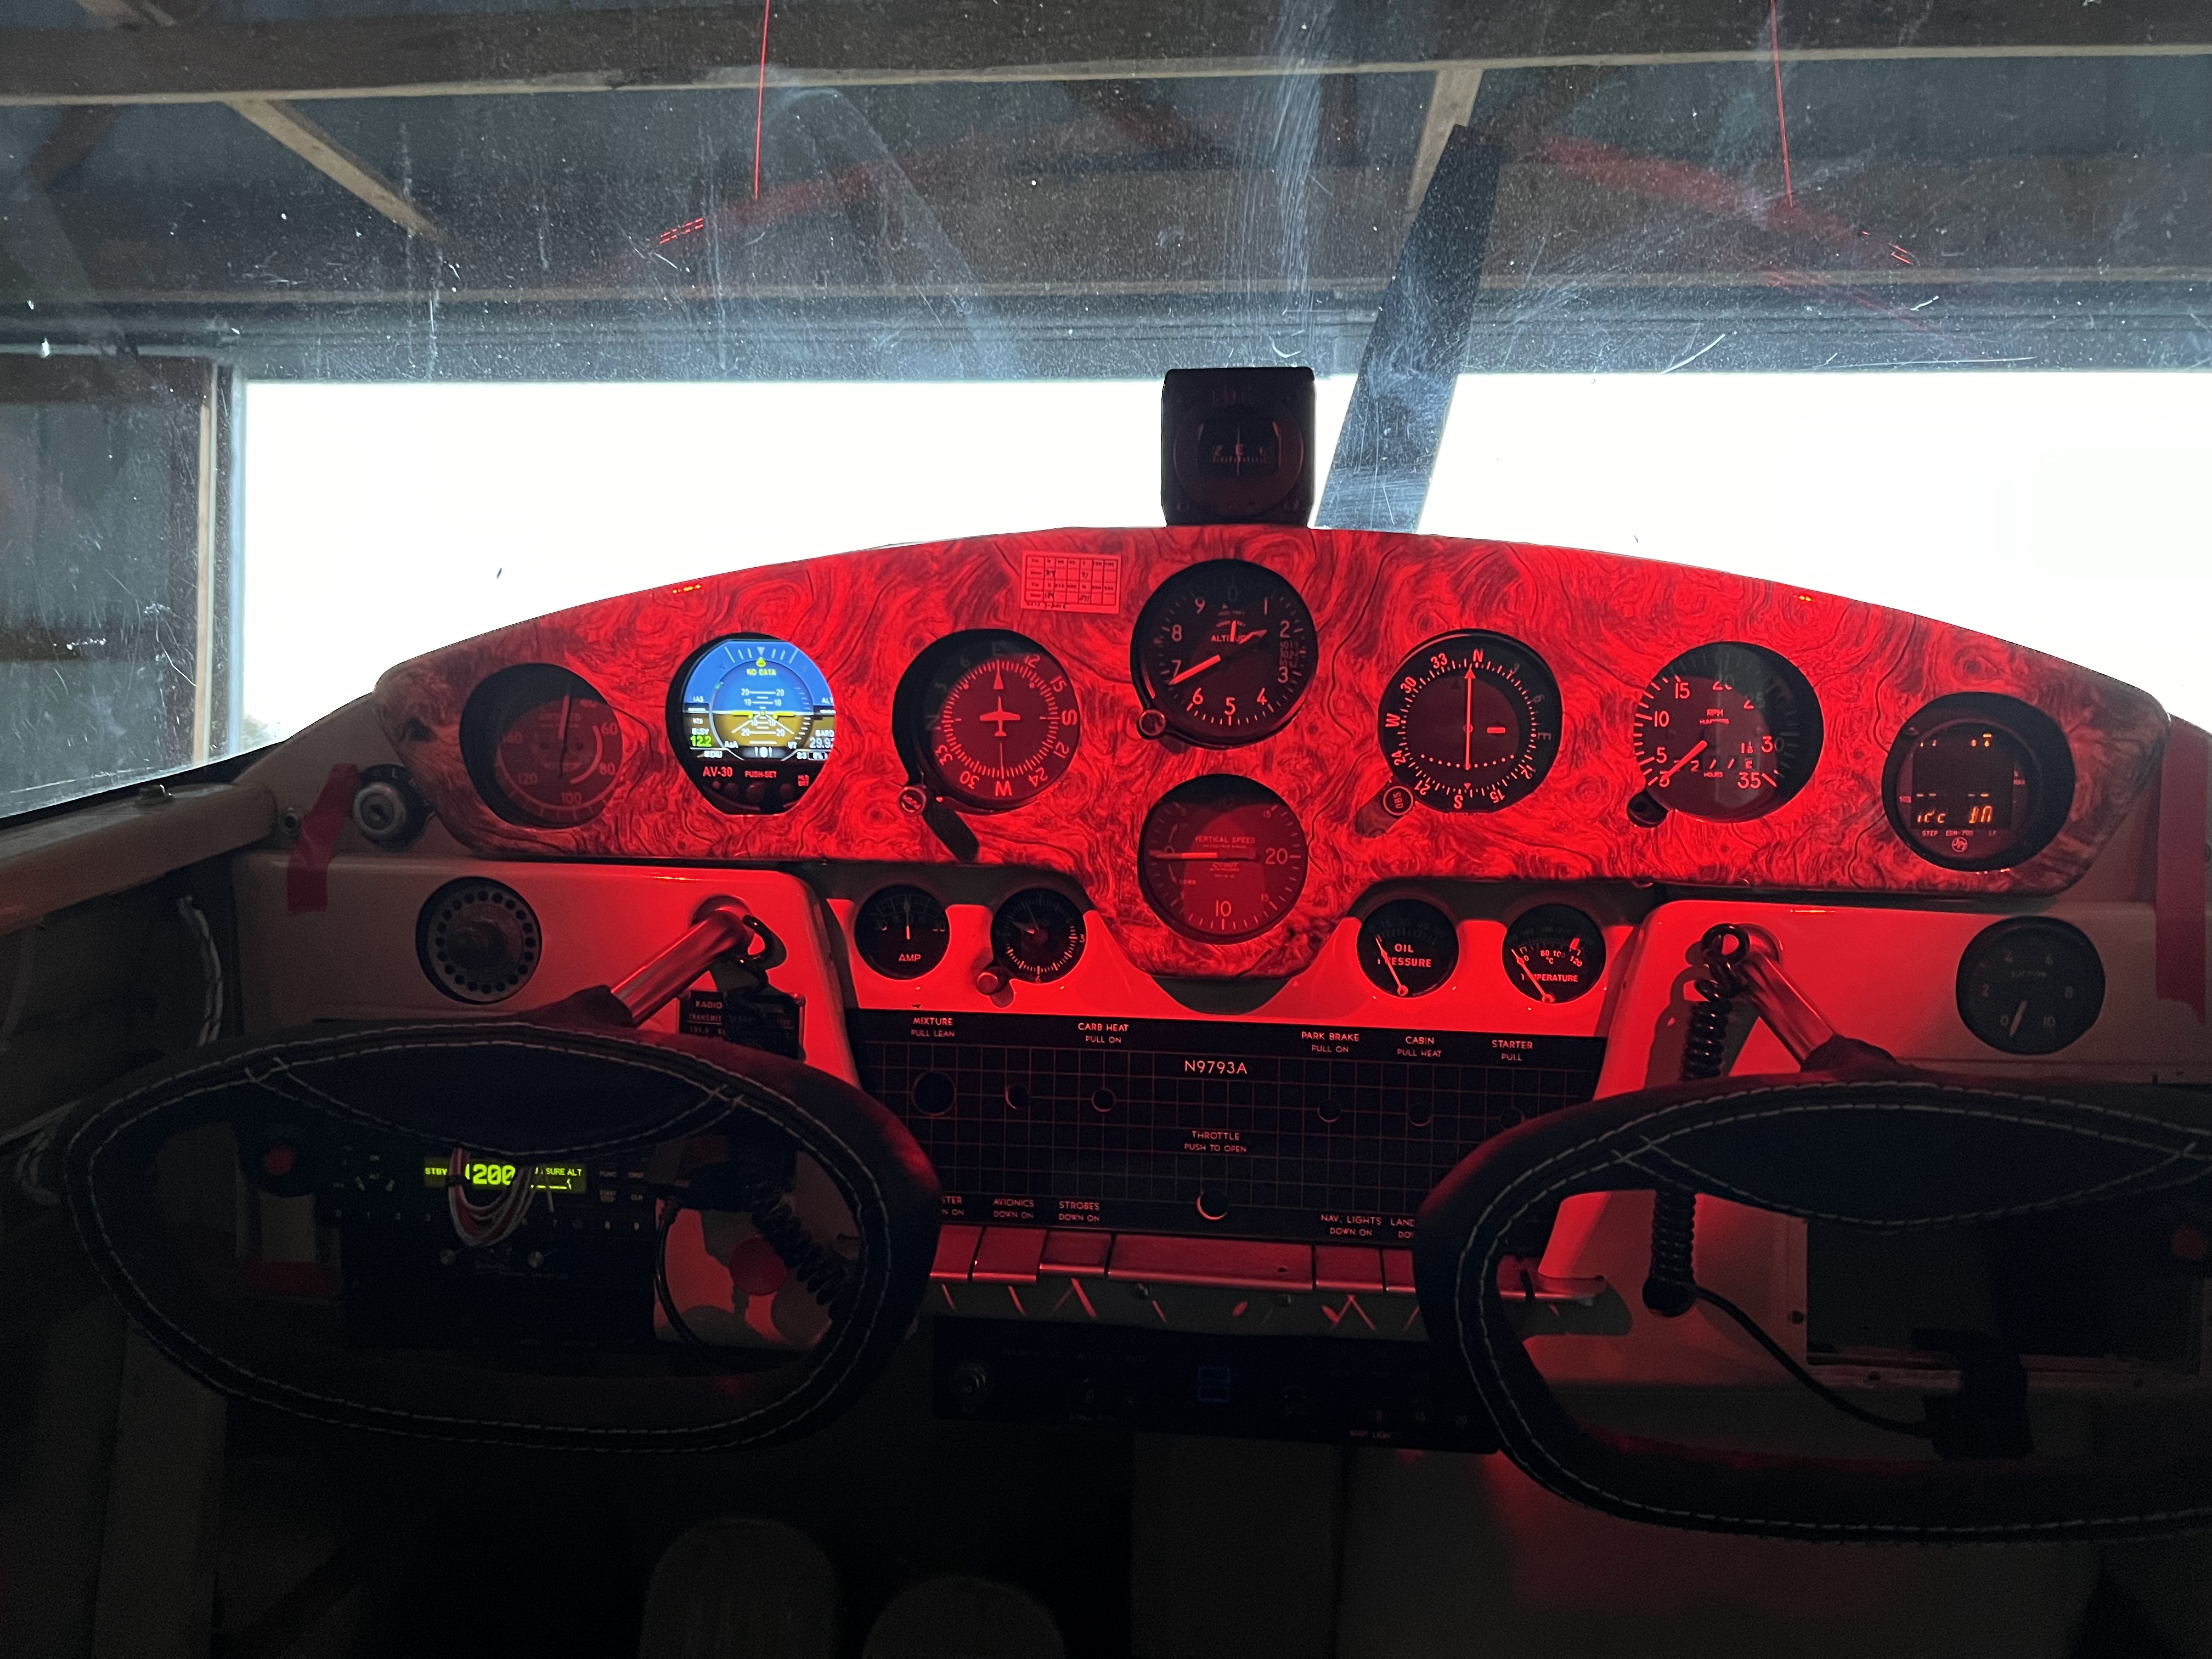
I left the PN's and such in this post so if anyone wanted to know what was used they can use it as a reference. Sourcing things sometimes was a challenge, or time consuming, so I figured maybe it could help someone save time doing the same things. Proper kudos to this club for such an amazing community and thanks for answering questions for me along the way!!
LIST OF WORK PERFORMED:
Upgraded Panel Circuit Breaker Layout
- Added all new 7277-2 Circuit Breakers for every circuit besides the 50 AMP ALT breaker
- Added breaker for USB and MAP Lights
- All wiring used was MIL-W-22759/16 wire which complies with current military and anticipated future FAA requirements. Wire size was in accordance with breaker size
- Replaced five standard fuses with 7277-2 Circuit breakers. The circuits were for the AI (AV30), Radio, Beacon, NAV Lights and Landing/Taxi Lights
- Replaced stock CA-2 breaker with new breaker
- New Breaker Panel is an Owner Produced Part
- New Circuit Breaker and Switch Wiring Diagram Completed
Installed all new Switches and Grommets in the Piano Key switch Panel
- Switch P/N: AN3021-1
- Elastic Grommet P/N: AN931-4-7
Installed OPLITE FAA-PMA DUAL COLOR 6 LED MAPLIGHTS
- FAA PMA Approved and Eligible for Cessna 170
Installed MAXDIM MINI DUAL DIM CONTROL UNIT for the Map Lights
- STC, PMA, RTCA/DO-160E SEC 21: RFE Qualified
- Complies to Cessna AD 93-24-15 regarding cockpit fires
Installed Garmin GSB-15 USB Dual Type-A Panel Mounted Charger
- FAA PMA Approved
Installed MC600 series solid wire Vernier Mixture Cable from McFarland
- Mcfarland P/N: MC600-2
Installed new Yoke Shaft Universal Joints
- Mcfarland P/N: UJC-KT-1
Installed new Delrin Yoke Balls
- Owner Produced Part
Yokes were leather wrapped and PTT Button/Support Bracket installed
- Work completed by AviationX.com
- Complies with FAR 25-853 12 Second Burn Test
Installed new Grab Handles
- Parachord handles from Lost River Parachord
- New Titanium handle ends fabricated by Bushliner.com
- Meets FAA Burn Requirements per AC-23A
- Minor Alteration
Installed new Plexi Panel, which is now fully legible and has the proper switch layout for current breaker and switch wiring. (Brian Olson is my hero)
- Owner Produced Part
Installed Cessna Ventube
- STC Provided
Installed new Rudder Return Spring
- P/N: 0310196-4
Installed new SCAT tubing and all new clamps in Engine Compartment
- SCAT-8 DUCTING 2" 13FT: Part #: 05-29908-13 - Mfr Part #: OPS8X144
- BREEZE CLAMP 300-32H: Part #: 05-14913 - Mfr Part #: 300 32H
Seat Frames and Seat Upholstery
- Installed Cessna 170B front seat frames that were refurbished by Mario at AircraftSeatFrames.com
- Fabricated New Rear support bar for rear bench seat.
o Owner Produced Part
- Installed new Seat Foam and Upholstery by SportAircraftSeats.com
o Complies with FAR 25-853 12 Second Burn Test
- Weight reduction of 18lbs for the bench seat and combined 16lbs for the Pilot/Co-Pilot seat. 34lbs reduction in total due to removal of seat springs, original covering and foam and then the secondary foam and coverings. After removal of these coverings was finally able to inspect the seat frames to determine they were tweaked and needed to be fully rebuilt. Upgraded to C170B frames which were more robust...and then had them made even more robust
Installed New interior Panel Upholstery
- Covered Door and Rear Side Panels with Ultraleather Material Black and Tan
- New Left and Right Front Panel backing. 0.125” Kydex backing and then upholstered with UltraLeather
o Complies with FAR 25-853 12 Second Burn Test
o Owner Produced Parts
Installed new Vinyl Flooring With ¼ Soundproofing from SCS Interiors
- Complies with FAR 25-853 12 Second Burn Test
- Added 6lbs of weight in comparison to stock carpeting. Well worth it for the gain in soundproofing, ease of cleaning the vinyl, as well as no more dirt buildup in the carpet as was found in the carpet that was installed at purchase
Installed Uavionix SkySensor to Right Wingtip
- FAA/PMA Approved
Installed new shielded wire from CB/Switch Panel to Wingtip Uavionix SkyBeacon and SkySensor
- Shielded 20GA 3 CON WHITE WIRE “ M27500-20TG3T14 to the right side Uavionix SkySensor
- Shielded 20GA 2 CON WHITE WIRE M27500-20TG2T14 to the left Uavionix SkyBeacon.
Separated Taxi and Landing Lights so they are on their own dedicated switch
- Used existing wire from Left Side SkyBeacon, which was replaced using shielded wire (above) and connected to Taxi Light and Taxi Light Switch to separate their functionality
Installed BAS Pull Handles
- STC Provided
Installed new Brackett Air Element
- BA6108 for BA2010, BA5110, BA5110A BA6110
Installed new Tempest Oil Filter
- TEMPEST AA48108-2 OIL FILTER
Installed new Silicone Baffling to engine baffles
Installed new Chafe Seal on lower engine cowl
Installed new fuselage to wing seals as well as new gap seals
Replaced stainless screws on the exterior of the aircraft


Circuit Breaker Layout


Panel before installing control cables:


SEATS AFTER FABRICATING
Mario, of aircraftseats.com, who is pretty awesome...upgraded tubing to thicker wall tubing and reworked the seats to near perfection. His brother Daniel at SportAircraftSeats.com did all the seat foam and coverings. Not advertising in any way, but these guys are the salt of the earth and do really good work.

Wanted to thank Brian Olson for his help with the Plexi. Turned out amazing and was a perfect fit. Plus the additional help he provided along the way. What a guy!!