Page 2 of 3
Re: '98C Gets a New Panel (Sort of...)
Posted: Thu Sep 23, 2010 9:04 pm
by Bruce Fenstermacher
gahorn wrote:Did Rick bust you for no 5 psi redline on your oil press? (Or is it just not evident.) He got me.

N7A had all those marks. I baffle them with the detail then they can't see the big stuff.

Re: '98C Gets a New Panel (Sort of...)
Posted: Fri Sep 24, 2010 2:25 am
by DaveF
cessna170bdriver wrote:Precise Flight SVS III Standby Vacuum System
That's an interesting idea ... if you had the SVS installed you could use it to spin up your gyros on the ground before takeoff.
Re: '98C Gets a New Panel (Sort of...)
Posted: Fri Sep 24, 2010 12:56 pm
by cessna170bdriver
DaveF wrote:cessna170bdriver wrote:Precise Flight SVS III Standby Vacuum System
That's an interesting idea ... if you had the SVS installed you could use it to spin up your gyros on the ground before takeoff.
That's the primary reason I installed it. I usually pull it on right after engine start, and push it off right before takeoff. Of course, the vacuum goes away with wide open throttle, but then the venturis take over. It also works well at the reduced manifold pressure generally used during an approach. There is an AD on the system, to test the shuttle valve periodically to make sure it's working, but it's not difficult or expensive to comply.
Re: '98C Gets a New Panel (Sort of...)
Posted: Fri Sep 24, 2010 2:01 pm
by DaveF
Oh, I misunderstood your description of the light. I thought it was just a low-vacuum indicator. And here I thought I had an original idea.

Re: '98C Gets a New Panel (Sort of...)
Posted: Fri Sep 24, 2010 2:47 pm
by cessna170bdriver
DaveF wrote:Oh, I misunderstood your description of the light. I thought it was just a low-vacuum indicator. And here I thought I had an original idea.
The light IS just a low vacuum indicator, but it is only on the primary source (venturis, in my case) side of the SVS shuttle valve (automatically switches to the strongest source). I think the original intent of the system was to provide a vacuum source in the event of vacuum pump failure. Since my vacuum pump (venturi system) is "failed" on the ground and when slow on an approach, that's when I use it.
Re: '98C Gets a New Panel (Sort of...)
Posted: Fri Sep 24, 2010 3:52 pm
by jrenwick
DaveF wrote:cessna170bdriver wrote:Precise Flight SVS III Standby Vacuum System
That's an interesting idea ... if you had the SVS installed you could use it to spin up your gyros on the ground before takeoff.
At one time I was thinking about adding this to my 170, for exactly this reason. I called the manufacturer and spoke with someone in engineering about what I wanted to do, and why. He said yes, it works well for that purpose, and it's something they can recommend. FWIW....
(I didn't end up doing it, partly because I found I have excellent gyros that will spin up and operate well enough on the 1" or so of suction my stock 8" venturis give me on the ground at about 1000 RPM. If I set my DG on the runway before takeoff, it's good to go and won't need much adjustment later. Also, I didn't think I would want to take off in such a low overcast that I would need the AI before it had time to stabilize.)
John
Re: '98C Gets a New Panel (Sort of...)
Posted: Mon Sep 27, 2010 5:46 am
by cessna170bdriver
Almost there! This weekend I finished cutting all the holes too large to do with a drill bit, drilled all the instrument screw holes, made the special cutouts for the CDI and altimeter adjustment knobs, and smoothed all the rough edges.
Since I'm not using the panel cover, I cut the yoke slots straight, rather than at an angle so as to hide the gap in those areas. This was the last item that needed to be done for a test fit in the airplane. Also note that I cut the outboard edges straight to alleviate the gaps there. If I were doing this again, I would extend the bottom edge downward a bit to hide the clearance arc in the panel frame for the vertical speed indicator (large hole in the bottom row, just left of center.
Panel Test Fit.jpg
While I had the panel in the airplane, I test fit the VOR CDI to check how well my method for locating the instrument screw holes worked. Looks good to me!
CDI Test Fit.jpg
The template I used was the instrument adapter plate formerly used to mount the CDI in the original AN attitude indicator hole (WAAAY bigger than the CDI - refer to the "before" photo of the panel in the first post of this thread). This plate came cut very square and symmetrical with very accurately located screw holes for 3-1/8" instruments. I clamped a framing square along the bottom edge of the panel as a "fence" to keep the template square, so the instruments will be clocked correctly. I used the template only to locate the panel under the drill bit, and removed it to actually drill the holes. I also have a similar plate for adapting 2-1/4" instruments. Locating these screw holes has by far been the most tedious part of the job to this point, as I don't have (or maybe just didn't think of

) any way to make fine adjustments.
Mounting Hole Template Setup.jpg
I used a vixen file to clean up the saw and shear marks on the outer perimeter, a deburring tool to knock off the sharp edges, and a 2" scotchbrite wheel in my die grinder for final edge polishing, both around the perimeter and inside the large holes. I still have several odds and ends to wrap up before installation, including holes for mic and phone jacks, glareshield lighting controls, external antenna jacks for the handheld, enlarging the shaft hole for the DG set knob, the slot for the oil temperature gauge sensor tube, and a hole for access to the vertical speed indicator adjustment screw. I'm estimating I have about 20 hours of work into this thing so far, so there's no way I could make a living producing panels, at least with the equipment I have.
Panel Almost Done 20100926.jpg
I'm thinking about having the panel black anodized, like the adapter plates. It should be a lot tougher than paint, and won't cause dimensional buildup like powder coating would. I have no idea how much it would cost to have anodizing done, so it ain't a done deal yet.
Re: '98C Gets a New Panel (Sort of...)
Posted: Mon Sep 27, 2010 4:17 pm
by 170C
Miles, you likely have a reason or preferance for having you panel black. Mine was altered back before I purchased it in '89 with the light weight aluminum cover dispensed with and just a bare aluminum instrument panel, but with eyebrow lights over each instrument (not a choice I would make as its almost impossible--at least for me-- to keep all the bulbs properly grounded and burning. Post lights would have been a MUCH better choice, however now with LED's overhead I don't need either) It was painted flat black and although I didn't ask my interior guy to do so, he elected to paint the panel a light shade of grey/gray. I really like the lighter color. It makes the cabin "feel" larger and in my case, blends well with the upholstry. If I were doing it again I would likely elect a lighter shade of grey/gray or maybe even some shade of white. That of course is an individual choice, but just thought I would mention it as a possible option.
Re: '98C Gets a New Panel (Sort of...)
Posted: Mon Sep 27, 2010 6:08 pm
by cessna170bdriver
Frank,
I'm open to ideas, but I've never seen a panel color I like better than black (matte or flat to minimize reflections), or at least something dark. I only rarely fly at night, but I'd think that a light colored panel might interfere with night vision, especially if illuminated? Can you post a picture of your panel?
Re: '98C Gets a New Panel (Sort of...)
Posted: Thu Sep 30, 2010 2:04 am
by GAHorn
you could always do what Bruce wishes HE had:
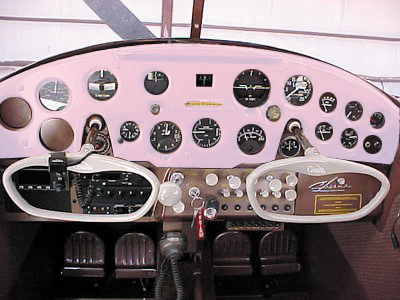
Re: '98C Gets a New Panel (Sort of...)
Posted: Thu Sep 30, 2010 5:10 am
by blueldr
What in hell is this one? A "Mary Kay" Special?
Re: '98C Gets a New Panel (Sort of...)
Posted: Thu Sep 30, 2010 6:58 am
by GAHorn
blueldr wrote:What in hell is this one? A "Mary Kay" Special?
It was a "jab" Bruce created specially for me.
Re: '98C Gets a New Panel (Sort of...)
Posted: Thu Sep 30, 2010 3:41 pm
by DaveF
Here's my gray panel. I like the color, if not the inefficient use of space and lack of spare holes. Or the later-style yokes.
3455Cpanel2.JPG
Re: '98C Gets a New Panel (Sort of...)
Posted: Fri Jul 08, 2011 5:43 am
by cessna170bdriver
Short of a few placards, it's done.
InstrumentPanel99pctDone.jpg
Re: '98C Gets a New Panel (Sort of...)
Posted: Fri Jul 08, 2011 2:51 pm
by cessna170bdriver
Aryana wrote:Nice matte finish. Did you end up anodizing it?
Unfortunately, the hole saw got away from me on one of the holes (bottom row, just right of co-pilot's yoke)
and I had to use a thin layer of filler to smooth things out. I ended up using Sherwin-Williams 988 self etching primer and matte black paint for the finish. Next time...