Page 1 of 2
Re-riveting the Elevator Bellcrank Bulkhead
Posted: Sun Dec 27, 2020 1:44 am
by cessna170bdriver
During 2597C’s annual we found two exterior rivet heads missing on the left lower radius of the aft fuselage where the elevator bellcrank bulkhead is located. From the outside, the shanks appeared to still be there, but one had paint on it, so it had been this way for quite some time?

A look on the inside with a borescope revealed that particular portion of the bulkhead flange to have no rivets in the holes and the flange not even seated on the skin, but get this: the two rivets with missing heads had partially formed shop heads UNDER the flange.
.
Closer inspection shows an area where about a dozen rivets are not adequately holding the bulkhead flange (the area circled in magenta in the IPC photo).
.
Seeing as how most of the rivets in this bulkhead are 5/32, and the same rivets in my ‘55 170B are 1/8, I assume this bulkhead has been either replaced or re-riveted sometime in the past, though I haven’t yet searched the logs to see when or by whom.
An AI who lives a few doors down from me is helping us with correcting this issue, and so far we’ve been able to drill out the the shanks of the two headless rivets, then remove the tails with a chip chaser, working through the inspection hole on top of the fuselage to the right of the vertical stabilizer. We thought it would be a good idea to get these two rivets replaced before removing existing rivets on up the side. We’ve been able to pull that lowest two-hole section of bulkhead flange against the skin with wingnut clecos, but since these rivets are in the lower left radius of the fuselage skins, in the tight area just to the left of the bellcrank bracket, we haven’t been able get a bucking bar located adequately, at least by the Braille method through that same inspection hole.
We’ve removed the baggage bulkhead cover and it looks like we might be able to get a better shot at it by going down the tailcone, once we get adequate support and padding back there to lay on. Does anyone who has done this before have any tips to offer regarding access, bucking bars, etc? We’ve thought about using cherrymaxes for these two hardest to reach rivets, but our AI is unable to find any guidance that says they can be used in this area.
Re: Re-riveting the Elevator Bellcrank Bulkhead
Posted: Sun Dec 27, 2020 1:59 am
by GAHorn
Miles, my EAA guide states “ Cherry rivets are another type of blind rivet. The friction Cherry rivet is a self-plugging blind rivet that has a hollow rivet and a stem, much like a pop rivet. They are available with a countersunk head or a universal head. The designation for a countersunk is CR9162 and the universal head is CR9163. The strength of this type Cherry rivet is less than the bulbed type that will be subsequently discussed. You cannot replace a solid shank rivet with the same size of this type rivet. You must use 1/32 inch diameter larger to obtain the necessary strength. A special tool is required to pull these rivets.
Cherrylock and Cherrymax rivets are suitable replacements for the same size solid shank rivet. ”
I’m not an expert on this... but your AI might be interested in this.
Re: Re-riveting the Elevator Bellcrank Bulkhead
Posted: Sun Dec 27, 2020 2:41 am
by cessna170bdriver
GAHorn wrote:Miles, my EAA guide states “ Cherry rivets are another type of blind rivet. The friction Cherry rivet is a self-plugging blind rivet that has a hollow rivet and a stem, much like a pop rivet. They are available with a countersunk head or a universal head. The designation for a countersunk is CR9162 and the universal head is CR9163. The strength of this type Cherry rivet is less than the bulbed type that will be subsequently discussed. You cannot replace a solid shank rivet with the same size of this type rivet. You must use 1/32 inch diameter larger to obtain the necessary strength. A special tool is required to pull these rivets.
Cherrylock and Cherrymax rivets are suitable replacements for the same size solid shank rivet. ”
I’m not an expert on this... but your AI might be interested in this.
Thank you George. We are thinking of Cherrymax, not Cherry, though in our case the holes are already oversized by 1/32. Our AI is a retired Delta Airlines mechanic, so he probably won’t put much stock in an
EAA guide, but would be more likely to follow guidance from the
FAA or Cessna.
Re: Re-riveting the Elevator Bellcrank Bulkhead
Posted: Sun Dec 27, 2020 5:05 am
by n2582d
AC43.13-1B paragraph 4-57, f, (2) says in bold and underlined font:
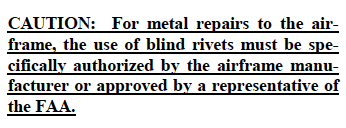
- Screen Shot 2020-12-26 at 8.05.37 PM.png (21.05 KiB) Viewed 4763 times
Cessna's Structural Repair Manual has a table listing approved replacement fasteners in Chapter 51 (51-40-00 pg. 3). This manual doesn’t specifically apply to the C-170 but I think it’s as close to an official Cessna source as you’re going to find. For what it's worth NAS 1398 rivets cross to Cherrylock CR 2263, NAS 1738 cross to Cherrylock CR 2249, and NAS 9301 cross to CherryMax CR3213 rivets.
Re: Re-riveting the Elevator Bellcrank Bulkhead
Posted: Sun Dec 27, 2020 9:26 am
by c170b53
The fingers on that bulkhead are light and they would have to be held against the structure to allow the rivet to be set otherwise they (fingers) will pull away and the rivet will form to tails, one between the skins the other on the outside. Done it many times often when I thought the parts were held tightly together. Out comes the drill, to drill out the rivet and re-do. So like you say Miles access is not great which made it hard to keep the work together. You’ve drill them out and used power clecos to hold the materials together, perfect. You should be able to do the same elsewhere. Larger rivets means a bigger bar which I guess is working against you now as is eroded edge distance. If the rivet is wobbly you could go oversize cherry max, you’ve correctly identified the problem, working through that hole means one hand when you need two. I’ve crawled up to that bulkhead many times only issue is the blood flow to the brain and working around the pull handles.
Re: Re-riveting the Elevator Bellcrank Bulkhead
Posted: Sun Dec 27, 2020 3:17 pm
by n2582d
Miles, Building an RV you’ve certainly pounded a lot more rivets than I ever have so I’m guessing you’re familiar with the following tip. An old time sheet metal guy at MAF taught me to use a piece of sponge or foam, with a small hole in the center, between the bucking bar and sheet metal you’re riveting to help clamp the sheets together. Just need it there for the first short drive.
Re: Re-riveting the Elevator Bellcrank Bulkhead
Posted: Sun Dec 27, 2020 4:01 pm
by cessna170bdriver
n2582d wrote:Miles, Building an RV you’ve certainly pounded a lot more rivets than I ever have so I’m guessing you’re familiar with the following tip. An old time sheet metal guy at MAF taught me to use a piece of sponge or foam, with a small hole in the center, between the bucking bar and sheet metal you’re riveting to help clamp the sheets together. Just need it there for the first short drive.
The clecos seem to be pulling the flange into place adequately; the bigger problem is access to buck the rivets. On the RV, when a flange won’t pull down with adjacent clecos, I use an o-ring over the rivet shank for the first few hits. Probably 3/4 of the nearly 12,000 rivets in my RV so far I’ve shot with a gun and bucking bar, but the vast majority of those are short #3s, with the build order planned for good access. Buckling #5s in the interior of an otherwise completely assembled airplane is a whole ‘nuther story.
Re: Re-riveting the Elevator Bellcrank Bulkhead
Posted: Sun Dec 27, 2020 5:22 pm
by n2582d
cessna170bdriver wrote:[... the bigger problem is access to buck the rivets. ...
Too bad
STC # SA000858DE, the
inspection panel kit from Aeropod, doesn't include the 170 as the fuselage is basically the same as the early 180.
The FedEx ramp agent in Grand Rapids is a skinny kid working on his A&P. I think he could use some valuable experience with a bucking bar in a tailcone. Charge him $25/hr. for the experience!

Re: Re-riveting the Elevator Bellcrank Bulkhead
Posted: Mon Dec 28, 2020 12:10 am
by 170C
Just a comment Miles. When I installed my Tail Pull Handles, I did not want to lay on the control cables. I didn't have any 4-6 inch foam so I spent more time making wooden pieces from 2x4's that were contoured to the bottom of the aft fuselage with cut outs for the cables than it took to install the handles. Then I could lay a piece of plywood on top of the "pieces" so I could lay on them and not put any pressure/strain on the cables. It was my job to crawl into the tail cone while my IA was on the outside. Also used my Tail Wheel lift to raise the tail up so I wasn't going downhill and more importantly not having to crawl backward up hill. Probably much overkill. Still have the pieces excluding the plywood. Probably never need them again, but if so I don't have to build again. Good luck with the riveting project.
Re: Re-riveting the Elevator Bellcrank Bulkhead
Posted: Mon Dec 28, 2020 5:15 am
by DaveF
Oh, ok, I've got it now ... this is your *other* 170. I couldn't understand how this could have gone unnoticed in the Great Rebuilding, or how your new paint could be so grimy already.
Re: Re-riveting the Elevator Bellcrank Bulkhead
Posted: Mon Dec 28, 2020 5:00 pm
by cessna170bdriver
We made a fair amount progress yesterday. We were able to put heavy cardboard down inside the belly, and surprisingly enough I was able to wiggle my bulk back far enough to get my head and shoulders into that last open bay and put eyes and hands directly on the elevator bellcrank bulkhead. After going through a box full of bucking bars I found an angled one that, with a minor adjustment, fit in the angle between the bellcrank bracket and the radius of the bottom skin.
 Viewed 4623 times")
Since the hole was up to a #21 for a 5/32 rivet I didn’t think that bar was heavy enough, so I taped my nearly 2-lb tungsten bar (not much bigger than a pack of chewing gum) to the side of it for more mass. It isn’t perfect, but passable. For the other hole in that segment of the flange, I found that with the screw removed and in that confined space, I couldn’t generate enough force to push he flange flush to the skin, but I did find that I could use a small prybar and a 2x4 block to pry it down flush. There being no way to also get a bucking bar in there, our AI decided that we could install a Cherry Max there, and could reference Cessna’s Structural Repair Manual for approval.
 Viewed 4623 times")
Working up the side, there was a 5-hole flange not held flush to the skin. We drilled out the end rivets and used #6 screws to pull the flange flush, then replaced the center three with #4 AD rivets which bucked nicely with just my tungsten bar. Again, the ends can’t be held flush without the screws, so we’re also going to use Cherry Max rivets there also.
Our next scheduled workday is Thursday, and hopefully we can get this job wrapped up.
Re: Re-riveting the Elevator Bellcrank Bulkhead
Posted: Wed Dec 30, 2020 4:08 pm
by gobrien
Hey Miles,
Is it not possible to leave the screws in as the permanent fixture?
Gareth.
Re: Re-riveting the Elevator Bellcrank Bulkhead
Posted: Wed Dec 30, 2020 5:24 pm
by GAHorn
gobrien wrote:Hey Miles,
Is it not possible to leave the screws in as the permanent fixture?
Gareth.
Doubtless to his great relief...

.... I’m not Miles... but will offer that a screw (or any other threaded fastener) would/must be installed in a reamed-to-fit hole to be effective to work with other fasteners. Otherwise only one/or few fasteners would be supporting the load instead of sharing the load among all.
A major advantage of rivets is that they expand to fill the hole tightly in addition to clamping, whereas a threaded fastener relies chiefly upon friction/clamping to attain strength. So, I will guess that the answer provided by more competent folks than I will suggest that, while you could leave the screw in-situ... it would not provide the same strength as the “teamwork” of all riveted would. Further, while there are some exceptions, most screws are “all-thread” design....without shank.... therefore would not provide a tight shear fitment. (It would be poor form and not likely allowed in a certificated airframe without proper reaming.)
Re: Re-riveting the Elevator Bellcrank Bulkhead
Posted: Wed Dec 30, 2020 6:03 pm
by cessna170bdriver
George is correct; riveted joints are designed so that every rivet shares the shear load on the joint. To do that, each rivet swells up to completely fill the hole when it’s installed. If a screw or bolt is installed, or a rivet is installed improperly and doesn’t completely fill the hole, the shear load it should have handled is passed on to the others.
Re: Re-riveting the Elevator Bellcrank Bulkhead
Posted: Wed Dec 30, 2020 7:34 pm
by gobrien
I was thinking of something like
https://www.aircraftspruce.com/catalog/ ... 9-1-05.php suitably sized, this specific one is likely too big. This is a pan-head screw with a shank (used for seat belt harness attachment). While I understand that the rivet fills the hole my concern is that the parts are pulling apart, and the previous attempt resulted in a shop head forming between the parts which I've had happen. If you can get the holes close to appropriately reamed, the clamping action of the screw as it is driven closed will tend to pull the parts together, this would seem a better option to riveting those 2 holes, even with blind rivets.
This may not be permitted with a certified plane; which was more where I was headed. How much discretion does one have to do such things?